Map network drive on MacOS (one-time)
Nowadays, most NAS devices are seriously easy to map. Let’s say that you’ve been working on a document in your home office but have just remembered a key fact that you want to include. Time to make a quick edit from your wife’s laptop before you forget about it!

Network drive access can be obtained in three simple steps, provided you don’t mind having to repeat those steps if the connection drops, you restart your Mac, or the device is disconnected:
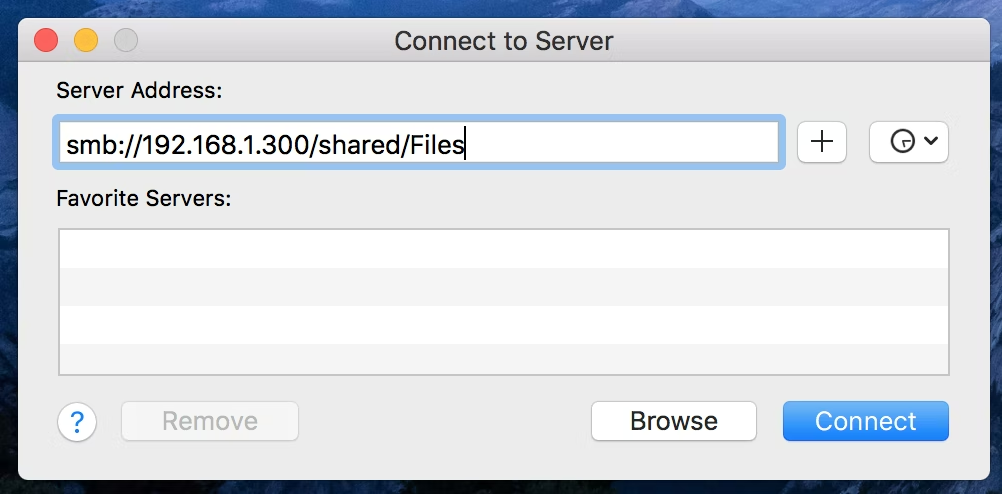
- In Finder, either hit Command+K to bring up “Connect to Server” or click Go > Connect to Server
- Enter the path of the network drive you’re trying to map (e.g. smb://192.168.1.300/shared/Files) and click Connect
- Enter your login details and password then click OK to mount the network drive
You can now access the relevant drive either via your desktop or the sidebar in Finder windows.
Automatically connect to a network drive on Mac
Maybe you have a server in your office with a connected network drive and want all your employees to be able to connect to it so they can collaborate on shared documents. If you want to keep a Mac connected to a network drive, even after restarting, the easiest way to do this is to follow the three steps above then add these:
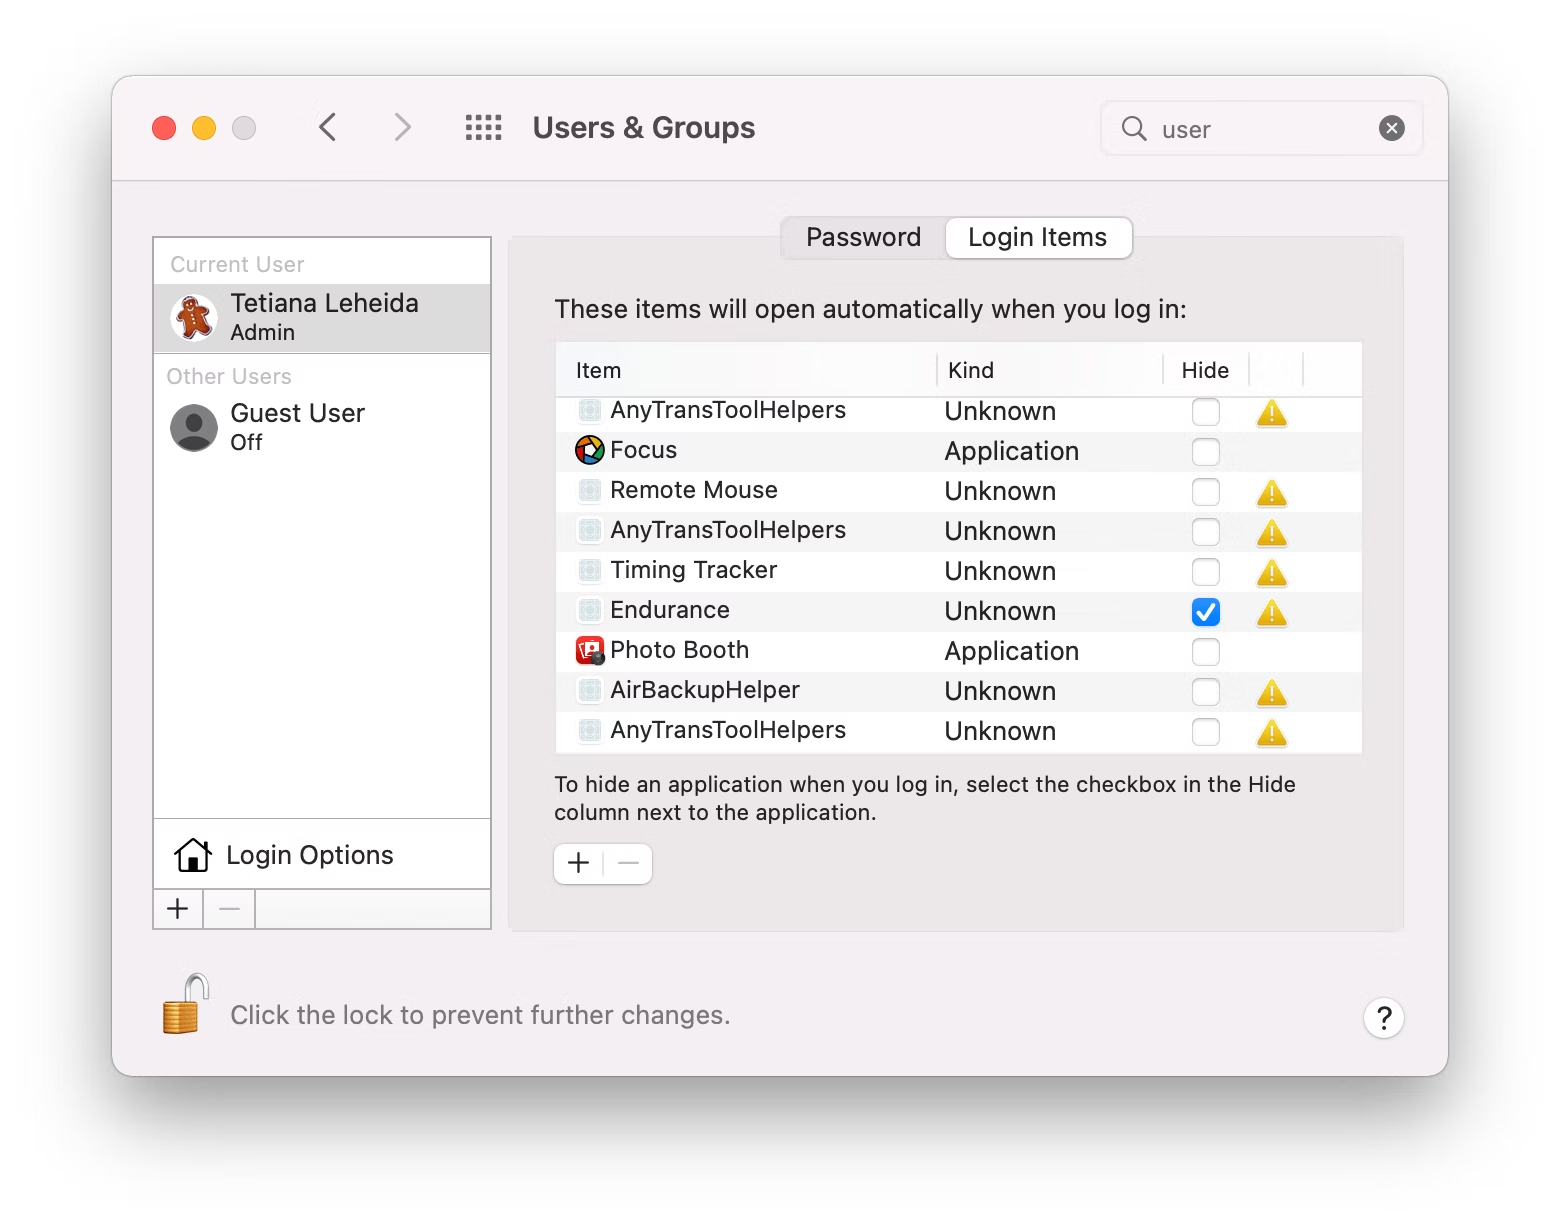
- Hit the Apple menu, then System Preferences > Users & Groups
- From here, select Login Items and click + to add a new item
- Find your network drive and click Add, then close the window

This is how to map network drive on macOS so it stays connected even after reboot. Network drives won’t, however, connect automatically if you’re using a different WiFi network.
Remount a mapped network drive with one click
Managing, or working across, multiple departments that each have their own network drive? In that case, it can be handy to create aliases of mapped network drive(s):
- Right click on any mapped NAS device on your desktop.
- Select Make Alias